This simple method turns plastic bottles into your own mushroom garden…
This Simple Method Turns Plastic Bottles into Your Own Mushroom Garden
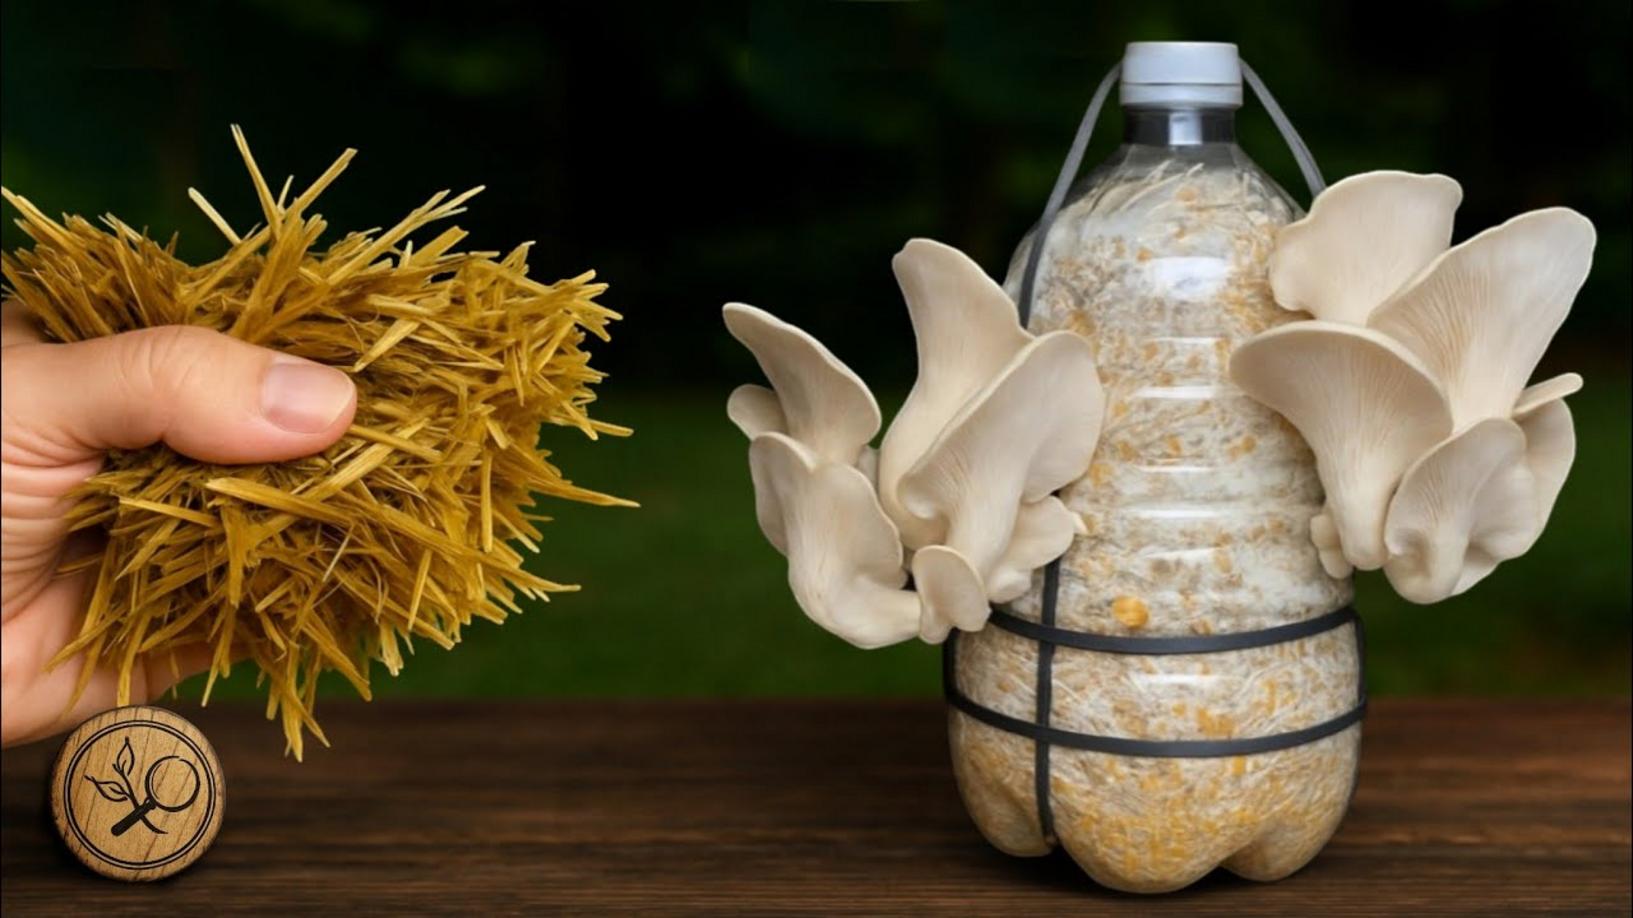
Are you ready to embark on a fun and rewarding gardening project? Cultivating your own mushrooms using **plastic bottles** is an innovative way to enjoy fresh, home-grown fungi while recycling at the same time. In this guide, we’ll walk you through the entire process from selecting the right substrates to inducing mushroom production. Let’s get started!
1. Substrates for Cultivating Mushrooms
The first step in your mushroom-growing adventure is choosing the right **substrate**. This serves as the nourishment for your mushrooms. Some popular substrates include:
- Straw – An affordable and easily accessible option.
- Wood chips – Great for wood-loving mushrooms like shiitake.
- Coffee grounds – Rich in nutrients and a waste-reducing choice.
2. Preparing the Substrate for the Mushrooms
Once you’ve chosen your substrate, it’s time to prepare it. Here’s a simple method:
- Chop your straw or wood chips into small pieces.
- Soak the substrate in water for about 24 hours to hydrate it.
- After soaking, drain excess water and let it cool.
Properly preparing your substrate is vital for successful mushroom growth!
3. Container for Mushroom Cultivation
For this project, **plastic bottles** are the perfect containers. Here’s how to prepare them:
- Clean the bottles thoroughly to avoid contamination.
- Cut off the top of the bottle and make several small holes in the sides for air circulation.
- Fill the bottle with your prepared substrate, leaving some space at the top.
4. Mycelium for Mushroom Planting
Next, you need quality **mycelium**. This is the root structure of the mushroom. You can purchase mycelium online or at local gardening stores. Make sure to choose the right type for the mushrooms you want to grow!
5. Planting the Mushrooms
Now comes the exciting part—planting! Follow these steps:
- Mix the mycelium into the substrate you prepared.
- Pack the substrate firmly but not too tightly in the bottle.
- Seal the top with breathable material like cheesecloth to allow airflow.
6. Incubating the Mushrooms
After planting, your mushrooms need a cozy environment to incubate. Place your bottles in a warm, dark area for about two weeks. Keep the temperature consistent, ideally around 70°F (21°C). Check periodically for moisture; the substrate should stay humid!
7. Inducing Mushroom Production
Once your mycelium has colonized the substrate, it’s time to induce mushroom production. Move your bottles to a cooler, well-ventilated area with indirect light. Mist them regularly to maintain humidity.
8. Production Chamber
If you want to take it a step further, consider creating a **production chamber**. A simple plastic tent or enclosed space can help retain moisture and provide a controlled environment for optimal growth.
9. Super Final Tip
Always stay vigilant for contamination! Clean your tools and workspace to avoid undesirable molds. If you see any unusual colors or smells, don’t hesitate to discard the batch.
Conclusion
Growing your own mushrooms in plastic bottles is not only easy but also an exercise in sustainability. By utilizing your old bottles, you’re contributing to reducing waste while enjoying fresh produce right from your home.
So, gather your materials and start your mushroom garden today! You’ll be amazed at how fulfilling this hobby can be. Happy gardening!