7 Steps to Create a Mini Greenhouse for Growing Vegetables with Food Wrap
How to Create a Mini Greenhouse for Growing Vegetables with Food Wrap
- Introduction
- Required Materials
- Design Ideas for Your Greenhouse
- Step-by-Step Guide to Build Your Greenhouse
- Common Mistakes to Avoid
- FAQ
- Conclusion
Introduction
Have you ever wanted to enjoy fresh vegetables throughout the year but struggle with the seasons? Perhaps you’ve tried planting indoors only to find that your plants lack the sun they crave. Building a mini greenhouse can be a simple and effective solution to ensure your plants thrive, regardless of the weather outside. In this guide, you will discover how to create a functional space using items you likely already have at home. Keep reading to uncover the steps involved in setting up your very own mini greenhouse!
Required Materials
To get started on your mini greenhouse, gather the following materials:
- Plastic food wrap — Choose a durable variety that can withstand environmental conditions.
- Cardboard boxes — Find sturdy boxes that can hold the structure together.
- Scissors — For cutting the food wrap and cardboard as needed.
- Tape — Strong adhesive tape to secure the food wrap.
- Stakes or small wooden pieces — To provide stability if you’re placing it outdoors.
Design Ideas for Your Greenhouse
Your mini greenhouse can be as creative or simple as you choose. Here are some design ideas to inspire you:
- Vertical garden approach — Use tiered cardboard boxes to create space-saving layers for your plants.
- DIY frame — Construct a simple frame using wooden stakes for enhanced durability and then wrap it with food wrap.
- Portable design — Create a smaller version that can easily be moved indoors during extreme weather.
Step-by-Step Guide to Build Your Greenhouse
Follow these simple steps to create your mini greenhouse:
- Choose a location — Find a sunny spot in your yard or on a balcony that receives ample light.
- Prepare the cardboard boxes — Cut the boxes to your desired height for your plants.
- Secure the boxes — Tape the boxes together to form the structure of your mini greenhouse.
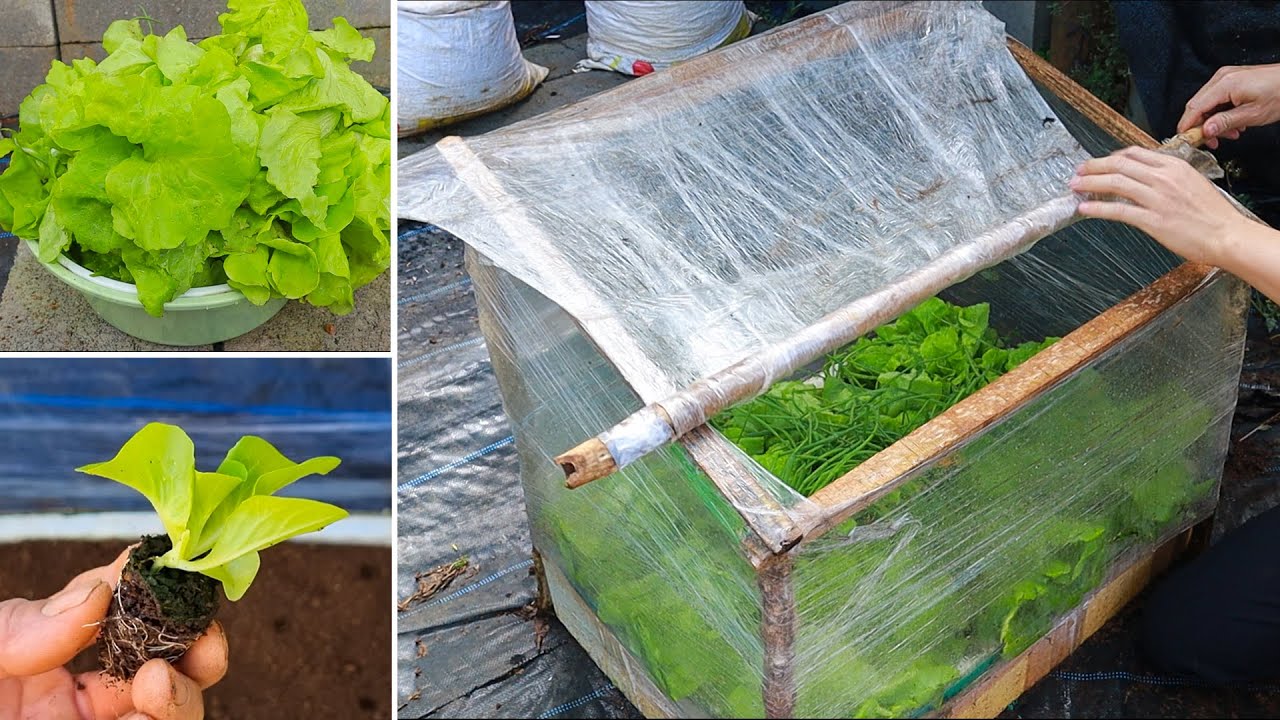
- Wrap in plastic — Cover the framework with food wrap, ensuring it is tight and secure. Leave gaps for ventilation.
- Insert your plants — Once your greenhouse is complete, place your seedlings or small plants inside.
Tips for Maintaining Your Greenhouse
- Check the temperature regularly and ensure adequate ventilation to avoid overheating.
- Water your plants as needed, taking care not to overdo it.
Seasonal Adjustments
As seasons change, adjust the coverage of the food wrap. In the warmer months, consider adding vents to keep your plants comfortable.
Common Mistakes to Avoid
When creating your mini greenhouse, avoid these common pitfalls:
- Not securing the wrap properly — This can cause the structure to collapse or let in too much cold air.
- Overcrowding the space — Make sure each plant has adequate room to grow without competition for nutrients.
- Ignoring ventilation needs — Proper airflow is crucial for plant health, especially during warmer days.
FAQ
What types of vegetables can I grow in a mini greenhouse?
Some great options include lettuce, herbs, and small peppers, which adapt well to the conditions inside a mini greenhouse.
How can I ensure my mini greenhouse stays warm?
Position it in the sunniest available location and consider wrapping the outside with an additional layer of food wrap during colder nights.
Can I use any type of plastic wrap?
It’s best to use food wrap that is thick and durable, as thinner varieties may tear easily and provide less insulation.
Conclusion
Creating a mini greenhouse for growing vegetables with food wrap is a rewarding project that can yield delicious results. With careful planning and execution, you can enjoy a flourishing garden even in limited spaces. What vegetables do you look forward to growing in your mini greenhouse?