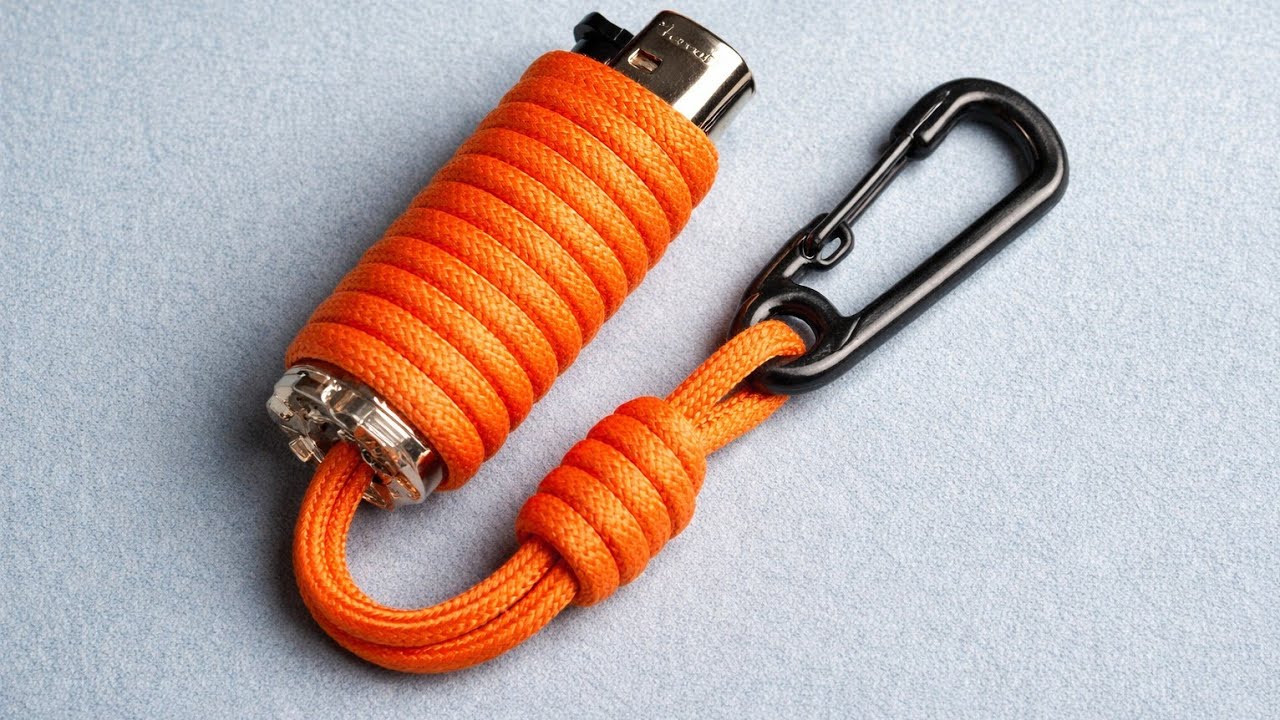
5 Steps to Master a Smart Rope Knot and Transform Your Lighter!
Mastering Smart Rope Knots: Transform Your Lighter with These Simple Steps
- Introduction
- Understanding Smart Rope Knots
- Required Materials
- Step-by-Step Instructions
- Common Mistakes to Avoid
- FAQ
- Conclusion
Introduction
Have you ever found yourself struggling with a lighter that seems to lack flair or functionality? Upgrading your lighter can be both a practical and creative endeavor. Many people overlook the importance of a well-tied knot, which not only enhances aesthetic appeal but also improves usability. By learning to master a smart rope knot, you can transform your lighter into a stylish tool. Continue reading to discover how you can make this interesting improvement.
Understanding Smart Rope Knots
Before diving into the practical steps, it’s essential to understand what a smart rope knot is and why it’s valuable. This type of knot is designed for both strength and ease of untying, making it perfect for various applications, including enhancing your lighter.
What Makes a Smart Rope Knot Special?
The smart rope knot is unique due to its versatility and reliability. It holds securely under tension yet can be easily released when needed. This balance of security and convenience is especially valuable for everyday items like lighters.
When to Use a Smart Rope Knot
This knot is great for personalizing your lighter but can also be used in various crafts and repairs. Its adaptability makes it an excellent skill to have for various DIY projects.
Required Materials
To create a stunning smart rope knot for your lighter, you’ll only need a few simple items. Here’s what you’ll need:
- A lighter – Choose one you wish to personalize.
- Rope or paracord – A length of rope that fits the design you want.
- Scissors – To cut the rope to your desired length.
Once you have these materials on hand, you’ll be well-equipped to learn the steps involved in creating your smart rope knot.
Step-by-Step Instructions
Here’s how you can create a smart rope knot to transform your lighter:
Step 1: Prepare the Rope
Start by cutting a piece of rope to your desired length. A good rule of thumb is to use a length that is about three times the height of the lighter.
Step 2: Create the Initial Loop
- Make a loop at one end of the rope. This loop will serve as the starting point for your knot.
- Pass the longer end of the rope through this initial loop, bringing it back toward the front.
Step 3: Form the Knot
- Wrap the longer end around the shorter end to create a second loop.
- Thread this end back through both loops you’ve created so far.
Step 4: Tighten the Knot
Once all parts of the knot are in place, pull on both ends of the rope firmly. This will secure the knot tightly around your lighter.
Step 5: Trim Excess Rope
If needed, use scissors to trim any excess rope for a cleaner look. Ensure that the knot is stable before making any cuts.
Common Mistakes to Avoid
Even when mastering the smart rope knot, there are a few common pitfalls to keep in mind:
- Using the wrong rope length can lead to either too much excess or a knot that doesn’t wrap correctly.
- Not tightening the knot enough may result in it coming undone during use.
- Rushing through the steps can cause you to miss crucial details, which affects the knot’s effectiveness.
FAQ
What materials can I use for the rope?
You can use various types of rope such as paracord, cotton twine, or any sturdy string suitable for your project.
How do I make sure the knot is secure?
Always tighten the knot by pulling on both ends firmly before using it. This ensures that it stays in place.
Can I use this knot for other purposes?
Yes, the smart rope knot is versatile and can be used for crafting and securing items beyond just a lighter.
Conclusion
Creating a smart rope knot for your lighter can significantly enhance both its functionality and appearance. By following these steps and avoiding common mistakes, you can achieve a stylish and practical result. What personal touches will you add to your lighter? Feel free to share your ideas in the comments below.